Showing posts with label Tutorial. Show all posts

Monday, November 19, 2012

Tutorial: Yarn Wrapped Jar


This project was inspired by a dear, dear friend, who is also a brand new blogger! Yay!
Her blog is called Fleeting Beauty! I can credit her with almost anything I know about makeup.

So even though she is just starting out, you should all go follow her and give her some encouragement to keep going. I promise, if we can convince her to keep going, you will learn a TON from her. That girl KNOWS fashion and makeup!

Anywho, a few months before I left, she showed me how she put coffee beans in a jar and then used it to store her makeup brushes. SO CUTE!

So when I emptied out a coconut oil jar, I decided that this was the perfect use for it!

But my label wouldn't come off, and I wanted to look cute. Hence, the yarn.

Supplies: Yarn                                       Liquid Fusion Glue                                                Glass Jar
The Liquid Fusion Glue doesn't dry very quickly, which was perfect for this project.

This photo shows the lines I made with the glue before wrapping the yarn around the jar.


As you wrap, go quickly (so the glue doesn't dry on you), but make sure that you are getting an even wrap. You want the yarn strands touching each other and covering the whole jar.
From the photo at the top right, you can kind of see what I did with the beginning end of the yarn, but let me explain just to make sure it is clear.

  1. Place a line of glue perpendicular to the rim of the jar, running from the middle of the section you are planning to cover in yarn to the bottom edge of the section that will be covered.
  2. Place the beginning end of your yarn along the line, sticking it to the jar.
  3. Put the rest of your glue lines {see pattern above} on the jar
  4. When the yarn is stuck all the way to the bottom of your initial glue line, gently turn the strand of yarn at a 90 degree angle and begin to wrap it carefully around the jar. As you wrap the jar, you will be covering the beginning of strand of yarn. In other words, the strands you are wrapping around the body of the jar will be perpendicular to the beginning of the strand that is glued down.
  5. Keep wrapping until you have covered as much of the jar as you want covered
  6. Wait and hour or two to let the glue dry. {DO NOT CUT YOUR YARN}
  7. Follow the glue lines pattern a second time and wrap your jar again. This will give you a better coverage if you are using think yarn like I did.
  8. When you are finished wrapping the jar a second time, clip the end and be sure to secure it with some extra glue.
  9. Let it dry overnight and then fill with whole bean coffee and makeup brushes!
{Sorry that I didn't get better pictures of the process. I was hurrying so the glue wouldn't dry on me.}


The BEAUTIFUL final product!


The coffee beans are so beautiful aren't they? It makes me happy. <3
{There's lots of happiness going into this post. Can you tell?}


A day or two after these photos were taken, I moved the jar to the front. I wanted it more easily accessible and it was so pretty that I wanted it more in the forefront!


So pretty! I had so much fun editing all these pretty pictures. So you get to share in my joy by getting an overload of finished product photos!

Have you ever wrapped a jar in yarn? How do you store your makeup brushes?

Be blessed.
<3

Thursday, July 26, 2012

Adding Cap Sleeves to a Spaghetti Strap Dress

Hello dear readers!

Are you ready for another tutorial?
I am. It's been far to long. =)
Unfortunately this tutorial is not quite complete. I was altering this dress just a few hours before a wedding I planned to wear it to.  Thus, the final step was rather hurried and I forgot to take any pictures of it. =(
I will do my best to explain it thoroughly and feel free to email me with any questions you might have!

I cut my fabric from some leftover scraps I had. They matched perfectly!
For those of you who don't know what a basting stitch is...it is a straight stitch, but with your machine set so that it is longer than normal stitches. This also loosens the stitch so that it is easy to pull on the threads to gather the material.
(NOTE: I sewed the basting stitches about 1/3 to 1/2 an inch in from the edge of the material)

Next is the final step...
Start by attaching the sleeve to the front.
(NOTE: DO NOT clip off your straps...the cap sleeves will cover them, but the strap will still be the main piece holding up your dress.)

Take one gathered end of the sleeve and (starting on one side of the strap) pin the gathered section to the inside of the dress. Make sure that the fabric is pulled down far enough hide the basting from view when the dress is being worn.

To cross over the strap, fold the gathered fabric up and to the inside so that it is hidden from view and the fabric fold of the sleeve is meeting the fabric of the dress in front of the strap. You will sew it down this way. Place one more pin on the other side of the strap to hold the rest of the sleeve in place.

Using a needle and thread, sew the strap down. I sewed over and back across the sleeve to make sure that it was firmly attached. The bodice of your dress should have two layers...only sew through the inside layer of fabric.

Complete the same process to attach the sleeve in the back.

(NOTE: Before you start sewing the back of the sleeve, make sure that you measure to make sure the sleeve is the right length to fit comfortably over your should...measuring it by the existing strap is the easiest way to do this. You don't want your sleeve so loose that it falls off your shoulder exposing the original strap.)
Complete the same process for the other sleeve, clip your threads and you are done!

So curl your hair, put on make up and get ready for a fancy evening out...or in my case, a wedding!


If you use this tutorial, send me some pictures so I can see your beautiful creation!

Enjoy and, as always, be blessed!
<3


Linking Up:
Photobucket

Thursday, June 7, 2012

Simple, Sweet Cards

I originally made these cards for Mother's Day for my mother and mother-in-law.  However this simple, sweet design can easily be used for any sort of note.


Remember seeing these floating around on Pinterest?
Source                                                               Source & Tutorial                                                           Source

As soon as I saw these, I had my mother start collecting corks for me.  She mostly buys cheaper wine that has the fake, plastic corks.  However, I decided to try it anyways.  And guess what?  It works!!!


Now I just need to increase my ink pad collection…I only have one color (which is why the leaves and stems are drawn on =P)


I am not doing a full tutorial in this post for two reasons.
1. It is SO simple.
2. There is already a great tutorial
that I linked to above.


But I will give a supplies list:
As many corks as ideas
A creative mind
Sharpie (or other pen)
An exacto knife


Here is the final product of the gift for my Mom. Coconut Oil for her feet, a gift card for a pedicure, and the pretty card signed by all her children. I was quite proud of my cute wrapping. =P


Be blessed!

Thursday, April 5, 2012

White Chicken Pasta

I made this delicious dinner a few weeks ago and then promptly forgot to share it with you all.  =(
But here it is now!

(Sorry for the blurry photo)
For lack of a better name...
White Chicken Pasta


Ingredients for Chicken:
1-2 Defrosted chicken breast sliced into 1/2 inch strips
Olive Oil
Fresh Garlic
Cayenne Pepper

Directions:
1. Saute the strips of chicken in olive oil.  Cook on medium heat until partially cooked
2.  Add one to two cloves of freshly pressed garlic
3.  Add a 1/4-1/2 teaspoon Cayenne Pepper
4.  Continue sautéing chicken until cooked through


Ingredient for Asparagus:
Olive Oil
Garlic Cloves to Taste
Salt 
Pepper
2 tbs. water

Directions:
1. On medium low, saute the asparagus in the olive oil, fresh pressed garlic, salt, and pepper (to taste).
2. After 10 minutes of gentle sautéing, add the water and cover.
3.  Let the asparagus gently steam, stirring occasionally.  Add more water if necessary.
(I didn't stir mine enough because I wasn't paying attention was too busy taking pictures so they burned.)


Ingredients for White Sauce:
2 tbs butter
2 tbs flour
(or equal parts of the two)
milk
onion powder
garlic powder
fresh ground pepper

Directions:
1. Melt the butter in your sauce pan on medium heat
2.  Whisk in the flour
3. Add about a 1/4 cup milk
4.  Whisk in the milk until it begins to thicken.
6.  Add onion powder, garlic powder, and pepper to taste. Whisk.
5. Continue to add milk until you have the desired consistency.
6.  Add a little water (because it will continue to thicken as it cools).
7.  Take it off heat.

NOW...serve it all up and enjoy! 

Delicious!
Let me know if you try it.  I LOVE this meal!

Be blessed!

Monday, March 5, 2012

Keeping My Promises


Remember these?  I promised tutorials for these projects a week or two (or three) ago now.  So I'm here to keep my promises!

First Project:  Zig Zag Afghan
Gather Your Supplies:
Select your three yarn colors.  (I used Vanna's Choice brand yarn - Loved it!)  I used probably 15-18 balls of yarn total (including border).
Size G crochet hook
Scissors

Body:
Decided how many "zig-zags" you want your afghan to have.  Each little peak is about 3 or 3 1/2 inches.  Once you have a number multiply it by 14.  This is the number you need to chain on.
Turn and single crochet into the second chain from hook.  Single crochet in each of the next 5 chains.  *Single crochet 3 times into the next chain and then single crochet once into each of the next 6 chains.
(Summary:  By now you should have six single crochets leading to the little peak you just made with the 3 single crochets in one stitch.  You should also have six single crochets leading down from the peak to the valley that you are about to make.)
Skip the next chain and single in each of the next 6 chains.  Repeat from * until the end of your row.
Now chain 1 and turn.  Skip the first single crochet and single crochet in the FRONT LOOP ONLY of the second single crochet.  Single crochet in each of the next 5 single crochets (front loop only - this gives the blanket a nice ridged texture on both sides).  **Single crochet 3 times in the next single crochet (this should be the middle single crochet of the three in one stitch from the row before).  Single crochet in each of the next 6 single crochets; skip 2 single crochets and single crochet in each of the next 6 stitches - you should be heading back up to the next peak.  Repeat from ** until you have made the afghan the length you want it.  Switch colors every 6 rows.
(Don't forget = for the rest of the blanket, besides the border, you are crocheting in the front loop ONLY.)
Another Note: Try to crochet the ends of your threads in as you go...I only started doing that about 1/2 way through and weaving the threads in at the end was a PAIN!

Border:
(NOTE: For the entire border, stitch through both loops of the stitch instead of just the front loop)
Single crochet around the entire border of your afghan starting on a straight side.  Single crochet 3 times in each of the corners (make sure you are exactly in the corner).  On the top and bottom, (zig-zag sides) crochet as you did above for the body of the afghan (3 sc in the peak, skip 2 sc in the valleys).
On the sides you will have to just do your best to place the stitches.  Putting them too close together with cause the edge to ripple (not the end of the world considering it is a ruffled border anyways), and putting them to far apart will cause the border to pucker (really bad!).
*Join the circle when you come back around  to where you started and chain 3.  Double crochet 1 time into the first single crochet and 2 times into each of the single crochets down the entire side of the afghan.  Double crochet three times into the corner stitch (middle of the 3 stitches from the sc round).  Complete the top and bottom sides (zig-zag sides) using the same method you did with the single crochet round (and body of afghan) except using double crochets.  Finish out the round.  Repeat from * one more full round and then tie it off and cut your threads.  Weave them in and you are done!

(Note: I searched online for a pattern and used the ideas from a few.  In the end it was changed so much from the original patterns that it was my own.  The border I created completely by myself!)

Congratulations to anyone who actually completes this project!  You MUST link up a picture.  It is a huge accomplishment.


Project Two: Pleather Belt

Gather Supplies:
1/4 yard (or less) of pho leather
half the measurement of your waist of 2 inch wide black elastic
small metal buckle

Make It:
Cut two strips of pleather that are two inches wide.  To calculate the length of the two strips:

  1. Take your waist measurement, divide it by 4, and add 1/2 an inch
  2. Take your waist measurement, divide it by 4, and add 3 inches
Sew the short side (2") of each piece of pleather to one of the short sides (2") of the elastic.  It should look like  <pleather strip - elastic - pleather strip>  the pleather and elastic should overlap 1/4 inch on each side.
(NOTE: Test sewing on pleather ahead of time.  I ruined 2 potential belts because my tension was not correctly adjusted and everything puckered.)
See the following illustration for how to finish the buckle of your belt!


As always, if you have ANY questions, just leave a comment and I will do my best to get back to you in a timely manner.

Be blessed!

Wednesday, February 8, 2012

How to Store Meat

I saw this on Pinterest the other day and has to try it! So when I bought a bunch of sausage and hamburger meat this week, so I had the perfect opportunity!
Top photo is Pinterest, bottom photo is mine!

It was so easy! And I can buy large quantities which saves money. =D Double win!

While I am at it, I thought I'd share another money saving/meat storing trick with you. A week ago (or so), I bought a whole cooked ham, bone on. It was a fraction of the cost of the small boneless hams I normally buy. When I got home I spent about and hour slicing it into lunch meat cunning it for salads, and leaving large oddly shaped chunks (use is to be determined). I got three quart baggies of lunch meat, a quart baggie of cubed pieces, and still had the whole bone section with quite a lot of meat left on it!
I froze all the meat and can pull it out to eat in small chunks!


Linking Up Here!
The Pinterest Challenge


Well, hope some of you found this helpful!  Have a blessed day!

Tuesday, February 7, 2012

More Sister's Crafting Day Fun!

Remember that sister's crafting day I blogged about back in December?  Remember how I promised more tutorials and crafts from that day?  Well, I think I unconsciously decided to spread them out for a very long time! And finally, here's another one!


Isn't she talented?  I didn't get a full tutorial done, but the steps and pictures I do have will hopefully be enough for you to recreate this on your own.

The dress was made of several large strips of gathered fabric.  She cut off the bottom gathered layer.  Look how long it is without gathers!


Then she cut out the seam  that connected the bodice to the skirt of the dress and then used the middle two layers for the skirt.   (is this making sense with not many pictures?)  There was elastic around the waistband that was stretchy enough to use as the waist of the skirt.

So next she put a hem on it.  She ironed it over 1/4" and another 1/4" so that the raw edge was neatly tucked inside the fabric.
(See Picture Below)


Her final step was to take out some of the gathering in the seam holding the two ruffles of the skirt together.  There were two different seams and it was making a funny bump.  This one I don't have pictures for either and it is super hard to explain, but hopefully you won't run into that problem.  =)

Well, I hope this tutorial has been helpful...now get to work refashioning your own dress! And many thanks to Abigail for letting me share all her awesome projects.

If you want to see other projects from that day, check out these posts!

Be blessed!

Thursday, January 26, 2012

Basic Men's Belt

Time for another tutorial!
I am finally pulling out some of the crafts I used a Christmas gifts (I know...I'm a little late!).  I delayed them all because I didn't want to give away what people were getting, so I'm just now getting around to to posting them.  This was a stocking stuffer for my husband.  He is very specific about the type of belt he likes - no buckles, just the pull through type.
So after months of searching (to no avail), I gave up and decided to make him one.  Why not?  And just this past week I made him a second one!  He loves them both!


This is so easy, I almost feel bad making a tutorial out of it....but here you go.

Supplies:
Belting (I bought it by the yard)
The buckles off an old belt (You can also buy them new for only a dollar or two)

Step One: Cut the buckle off your old belt.


Step Two: Slip the new belting through both the loops.  Pull it through an extra inch and tack it down stitching as shown.

Step Three: Cut the belt to the right length (I had to cut Travis's shorter about three times!).  Then sew back and forth across the end multiple times.


Step Four: Pull the loose strands to fray the end for a modern, finished look!


And I am linking up to Blissful and Domestic's "Made it on the 25th" link party!


And on Gingerbread's Sweet Saturday Link Party!

Photobucket


So don't forget to follow me and then leave a comment so I can follow you back!  Thanks so much and enjoy!

Tuesday, January 17, 2012

Garlic Butter

I am ridiculously excited about this post!  My FIRST recipe.  It is delicious and super easy!


WHO LOVES GARLIC BREAD?

My husband does.  But I don't.  I'm kind of a simple person when it comes to butter.  I like it on breads, rolls, etc, but I'm really fine without it too.  When I put it on, I spread it pretty thin.  Thus, the butter that is normally spread on store bought garlic bread is WAY to thick.  So in the store last Friday, Travis and I were trying to decide whether to get garlic bread or not.  Being the unselfish man he is, Travis bought regular garlic bread and suggested that maybe I make garlic butter at home so that we could put as much as we each wanted on it.

I started thinking....why not?

What you need:
1/2 cup butter at room temperature (really soft)
1 large clove of garlic
parsley

First crush the garlic into the bowl with the butter and generously sprinkle with fresh or dried parsley.  (Really though, add as much garlic as you want and the parsley is mostly just for looks!)  I used my Christmas gift from my mom (a Cuisinart handheld blender with wisk and food processor attachments - click on the link to check it on Amazon) with the whisk to mix it all together.

Note: Use a much larger bowl then you think you need.  I had little splatters of butter all around the area I was working by the time I finished with the whisk.  Oops!

Transfer it to a smaller bowl and serve with warm french bread!


I love the strong buttery flavor mixed with a fresh garlic taste.  I really liked it and my husband loved it too!

So go plan an Italian night with garlic bread on the side!

Alesha <3

Monday, January 2, 2012

Sweater Refashion

Hello everyone!  So last week I posted the easiest craft from my "sisters crafting day", so now I'll post the most complicated one.  But don't get scared off!  It just takes a little extra time and concentration.  Really though, if I can do it, you can!


Here we go!

Materials Needed:

  • Old sweater
  • Sewing machine
  • Thread that matches the sweater
  • Scissors
  • Measuring tape/ruler
  • 2-3 hours
Step One:
Cut the sleeves off of the sweater, cutting right along the seam.  Set them aside for later.


Step Two:
Lay your sweater out on a flat surface, front facing up.  Measure the bottom of your sweater.  Mine was 14" across.  Find the middle point and mark it with a fabric marking pencil.  (Note - I don't own a fabric marking pencil so I simply use a white colored pencil.  It works great!)


Step Three:
Use a flat edge to mark from the center bottom of the sweater, all the way to the collar.  Then cut along your line to open the sweater up on the front.


Step Four:
My sweater had buttons along the top, so I cut them off and cut off as much excess fabric as I could.

I couldn't cut off the button holes or my
line would have been uneven.  So I just
cut off the extra fabric surrounding the button holes.
They will be hidden later, so don't worry!


Step Five:
Starting at the bottom of the sweater, fold each edge in a half inch.  Make sure you are folding the fabric toward the INSIDE of the sweater.  Iron the fold and then pin it as you work your way up the sweater.  Don't cut anything yet!  Keep folding fabric under, iron and pinning all the way around the collar.  You will probably fold it under more than half and inch around the collar depending on what your sweater looks like and the look you are going for.  Carefully try on the sweater with pins in and adjust the fron until you get a look you like.  (Note - I waited and did the collar later, but it just created an extra step and made it look not quite as finished.)

I don't have any pictures of the collar. Sorry!  I'm still getting used to taking pictures while I craft!

Step Six:
Sew it up!  Sew along the inside of the fold (1/2" seam allowance).  Try to keep the distance you sew from the edge even all the way around to give the edges of your sweater a nice clean look.


Step Seven:
Take out the pins and try on your sweater.  It should look like a vest right now.  Decide how much fabric needs to be taken off the sides to achieve the look you want.  Place pins at the sleeve hole and the hem to show what to take off.  (Note - It is easier to have someone help you with this step.  I had my sister measure and pin for me.)  DO NOT CUT EXCESS FABRIC!


Step Eight:
Turn the sweater inside out and repin the marks.  Sew in a straight line from the top pin to the bottom.  Do this on both sides!  Before you cut the fabric off, try the sweater on to make sure you like the shape and width of the sweater.  Don't worry if you have to do some adjusting.  I resewed one of my side seams 3 or 4 times!  When you are satisfied with the look, cut off the excess fabric.  
Just a reminder...make sure you are sewing with the RIGHT SIDES TOGETHER!  =)


Step Nine:
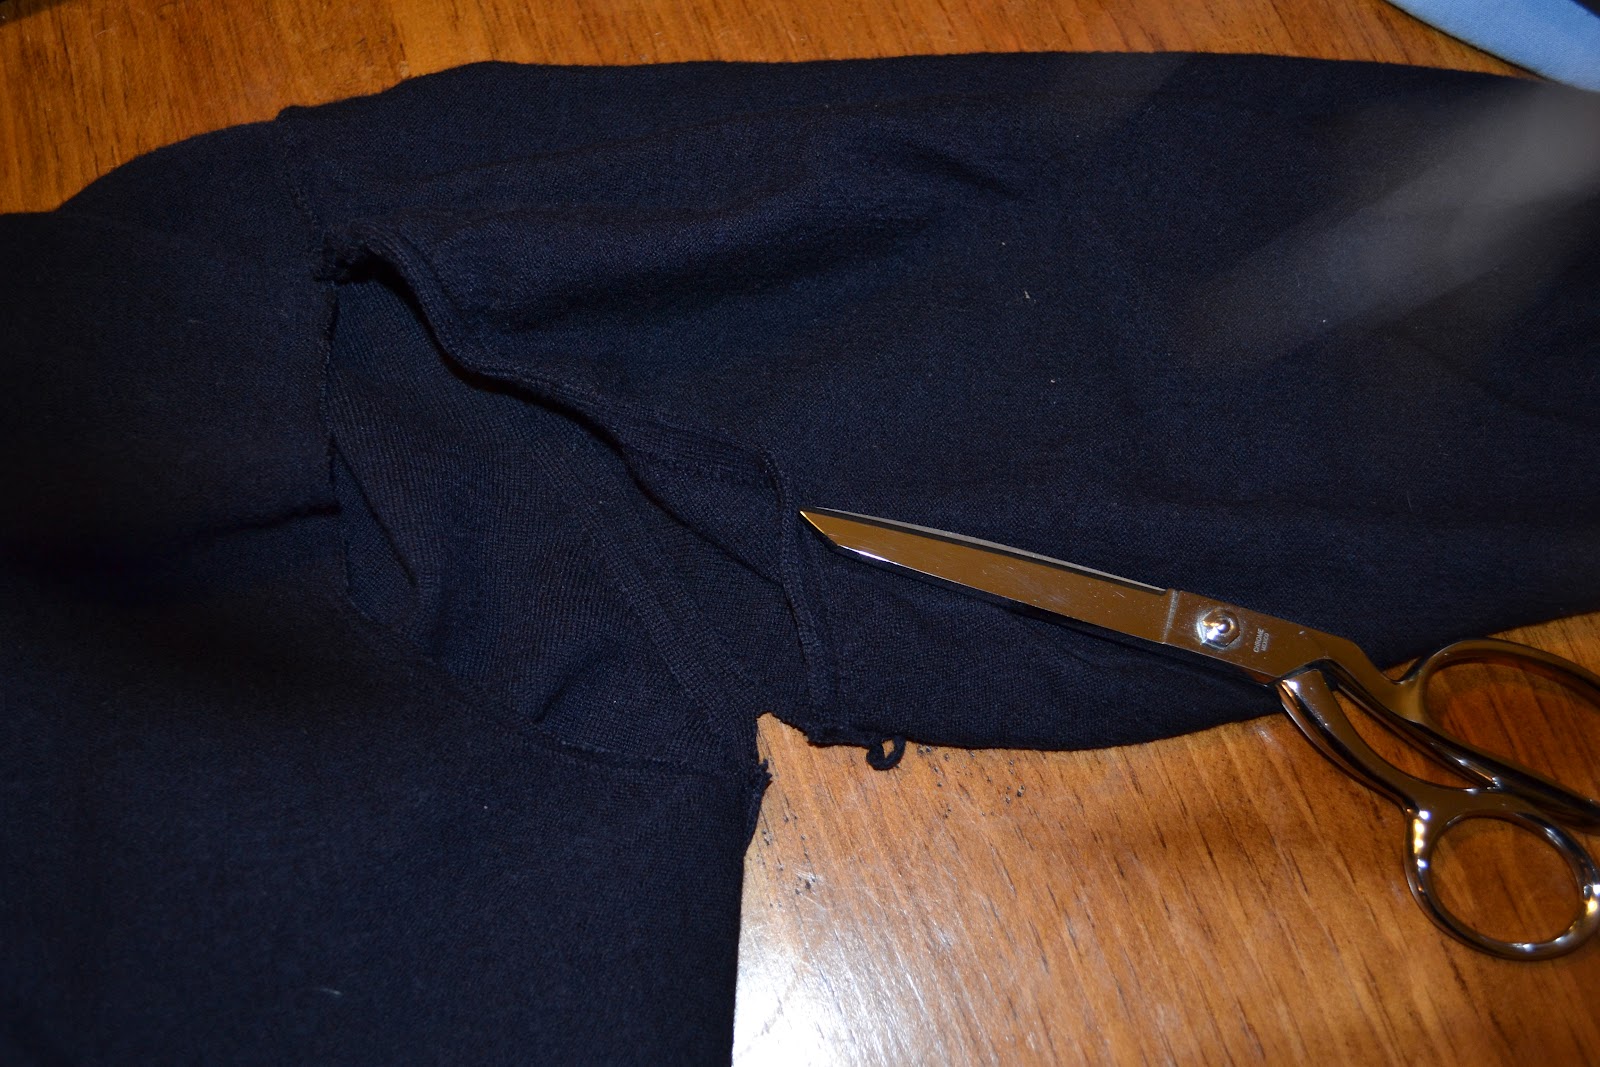
Now grab those sleeves again!  The sleeves were REALLY big and baggy on me.  To fix this, try your sleeve on INSIDE OUT and pin under the arm to a comfortable tightness.  Then draw a straight line from the pin all the way down the sleeve.  Then sew along the line you drew.  Turn your sleeve right side out and try it on.  If it fits well, cut off the excess fabric.
Repeat this step with your other sleeve.
Step Ten:
I wanted to make my sweater have 3/4 length sleeves so here is what I did...
With the sleeve right side out fold the cuff up over the sleeve.    Match up the seam under the arm and pin it!  Then sew along the bottom of the cuff (the part attached to the sweater).  Gently stretch the fabric as you go to make sure you don't get any puckers or wrinkles.  (Note - I pined mine all the way around to help me get it nice and even.)  Remove the pins and try it on.  Fold the cuff down to make sure the length is correct.  If you are happy, cut off the excess fabric.


Step Eleven:
Turn the sleeves RIGHT SIDE OUT and the sweater WRONG SIDE OUT. Match up the side seam on the sweater and the seam on the underside of the sleeve. PIN IT!


Pin the top of the sleeve to the top of the shoulder making sure that the fabric is even on either side.  Place other pins around the sleeve opening to hold it in place.  (Note - The fabric on the shoulder of my sweater hung off my shoulder a bit and would have made the sleeves sit down my shoulder a ways instead of on top of my shoulder like they should.  To fix this, instead of matching up the edges of the fabric when pinning at the top of the shoulder, I pinned the edge of the sleeve an inch in from the edge of the shoulder fabric and cut the excess fabric after it was sewn.  Sorry that I don't have a picture for this step!  If you have any questions, leave a comment and I will do my best to answer them.)

Step Twelve:
Sew around the opening of the sleeve.  Make sure you catch both layers of fabric.  I sewed it at less than a 1/4" to give myself as little fabric as possible on the inside.

Trim any thread and try on your beautiful masterpiece!

Here you go!  Hope you all find this useful.  I had a lot of fun with it and felt like a pro when I finished!  Have fun and show me pictures when you use it!