Monday, January 30, 2012

Smoothie LOVE

I LOVE SMOOTHIES!
They have been my recent obsession since Christmas.
Why Christmas?
Well for Christmas I got this amazing hand blender from my mom! I love it!  I would probably eat a smoothie every day for breakfast if I could.  As it is, I probably have started making them 3 or more times a week anyways.  But the cool part about my smoothies?
They are all GREEN!

Yep...green.  Bright green, dark green, even puke very dark green, but they are green!
Why?  Well, I put a giant handfull of spinach in them.  It sounds gross, but you honestly don't taste it and it cuts down on the amount of berries you use (saves $$$ and sugar intake).  Besides that, spinach is really good for you!
(Look here and here to learn about the health benefits of spinach and here for ideas on how to add more spinach to your diet - my idea is by far the best though!)


So here is my smoothie recipe!
Ingredients:
Frozen Fruit cut into 1/2" cubes
1 or 2 large spoonfuls of plain yogurt
banana
1 LARGE handful of fresh spinach
2 teaspoons jam (optional - I haven't been using it lately for a tarter taste and to lower the amount of sugar in my smoothies)
milk


Layer all ingredients (except milk) in your container.  Pour milk over the whole thing, until it covers about two thirds of the contents.

Place your handheld blender in the container.  Press down gently until the ingredient compact and the base of the blender is covered in milk.  Start blending.  I blend on high and sometimes gently pulse it.  Use an up and down motion with te blender to mix the ingredients thoroughly.
If you like your smoothie not quite so thick or cold, add more milk and/or partially defrost the fruit before blending.  I like my smoothies really thick and cold, but my husband prefers them more liquidy (is that word?).  So I do it both ways!
For frozen fruit I use mainly strawberries (delicious and the cheapest frozen fruit).  Also good and still cheap are mangos, peaches, and blackberries (surprise!).  You can also add a spoonful of frozen juice concentrate to add a new flavor.  I did it with orange juice concentrate and it was really good!

On a side note, all these photos were taken with my new iPhone!  I used Instagram and then made the collages with another iPhone app - Diptic.  Love it!  I am linking up to Let Birds Fly.


I hope you enjoy this simple breakfast recipe.  Leave me comments with recipes or photos of your delicious smoothies!  And don't forget to follow my blog.
Be blessed!

Friday, January 27, 2012

A Fashion Post?

Even as I sit down to write this I question myself a bit...
"Should I really be posting pictures of myself?  What if the clothes aren't really cute and trendy?  What if it is a total fashion bust and you just don't know it?  It wouldn't be the first time Alesha.  Are you SURE you want to do this?"

Ask my mom or any of my sisters...I am not the one to ask for fashion advice.  Most of the cute stuff in my closet has been because they have helped me pick it out.  I am just not good with it.  It's not that I don't want to look cute!  I try to look good every day, even when I'm just at home.  Somehow the outfits I pick are mismatched or old fashioned or are just wrong.  I guess it's a talent of sorts.

But you all have inspired me and I've been trying some new things.  Like my doleman tee.  You all are so good at picking out cute clothes and matching them together.  So here goes...
Introducing the....
...link party
(Okay so it's not a really link party...I haven't quite had time to figure out how to really do that yet.  But if you leave a comment with a link to your blog post, then I promise I'll try to figure it out soon!)

Every Friday (hopefully), I will put this up and you can "link up" a post showing one or more outfits you wore that week!  This will be a fun way for us all to get ideas from other people's wardrobe.  I want to be challenged, inspired, and motivated by you all to put together some new and exciting outfits!

So here is what I wore this week!


Bumble bee look!  I tried both white and black sweaters.  I decided that the black had the sharper look that I wanted.
Here are a few more pictures...I was having fun with collages!

and I wore this...

So please leave a comment with a link to what you wear!  Post all your experiments, boring outfits, or just plain silliness!  Thanks and I'm excited to see what you do.
Be blessed.

Thursday, January 26, 2012

Basic Men's Belt

Time for another tutorial!
I am finally pulling out some of the crafts I used a Christmas gifts (I know...I'm a little late!).  I delayed them all because I didn't want to give away what people were getting, so I'm just now getting around to to posting them.  This was a stocking stuffer for my husband.  He is very specific about the type of belt he likes - no buckles, just the pull through type.
So after months of searching (to no avail), I gave up and decided to make him one.  Why not?  And just this past week I made him a second one!  He loves them both!


This is so easy, I almost feel bad making a tutorial out of it....but here you go.

Supplies:
Belting (I bought it by the yard)
The buckles off an old belt (You can also buy them new for only a dollar or two)

Step One: Cut the buckle off your old belt.


Step Two: Slip the new belting through both the loops.  Pull it through an extra inch and tack it down stitching as shown.

Step Three: Cut the belt to the right length (I had to cut Travis's shorter about three times!).  Then sew back and forth across the end multiple times.


Step Four: Pull the loose strands to fray the end for a modern, finished look!


And I am linking up to Blissful and Domestic's "Made it on the 25th" link party!


And on Gingerbread's Sweet Saturday Link Party!

Photobucket


So don't forget to follow me and then leave a comment so I can follow you back!  Thanks so much and enjoy!

Wednesday, January 25, 2012

Voices I Know

I attend a women's bible study on Tuesday nights at my church. It is a good time of teaching and fellowship, but last nights lesson was particularly impacting. The text was Psalm 29-31, but the part the stood out to me was from Psalm 29. Here are just a few of the verses...

"The voice of the Lord is over the waters; The God of glory thunders; The Lord is over many waters. The voice of the Lord is powerful; The voice of the Lord is full of majesty." Psalm 29:3, 4 NKJV

The lady teaching this passage (who was one of my youth leaders when I was jn high school) pointed out that David knew God's voice. She challenged us, "Do you know God's voice?"

She reminded us of John 10 that talks about Jesus being our shepherd. In this passage, Jesus talks about how sheep recognize the voice of their shepherd. Look at these two verses...

"And when he brings out his own sheep, he goes before them; and the sheep follow him, for they know his voice. Yet they will by no means follow a stranger, but will flee from him, for they do not know the voice of strangers." John 10:4, 5 NKJV

Once again, she challenged us, "Do we become so familiar with other voices that we no longer recognize them as a threat? Two voices she pointed out that we often listen to were:
- The voice of reason = Do we rationalize our way out of doing what God has called us to? Do we take the easy path instead of obeying God's word?
- The voice of condemnation or shane = Do we fail to live in the grace and freedom that is given us in Christ Jesus? Do we live in constant fear if "messing up"?

Thus really hit home for me so I wanted to share it with you. I hope God uses it to speak to you also.

Be blessed!
Alesha <3

Monday, January 23, 2012

New Boots

After Christmas my sweet husband agreed to let me spend some of the Christmas money we received on boots. So I spent hours on the Sheikh website looking through dozens of pairs of boots. Finally (after votes from my 3 sisters had been tallied) I picked out 2 pairs! Yep...2! My husband generously suggested I get two since they were on sale and I couldn't decide between heels or no heels. They are ADORABLE! Here is the first pair (heels).


Aren't they amazing? I resewed my jeans to make them skinny jeans with this cool tutorial. I wish I had a photo if my whole outfit but by the time I could get one it was too dark and the lighting in our apartment is terrible!

Anywho, I am very happy with them. Big thanks to my sweet hubby. I'll get pictures up of the other pair room...hopefully with a full body shoot this time!


Don't forget to follow my blog and leave me a comment so I can follow yours! Be blessed. <3

Sunday, January 22, 2012

Snow Pictures

Isn't it BEAUTIFUL!!!

Those of you who live in snowy places are probably unimpressed and bored right now. But I have been thrilled! One problem: when you live somewhere that doesn't get snow very often and then you get 18+ inches out of the blue...everyone freaks out. So other than crazy drivers and business shutting down and the subsequent ice storm and massive power outages...this midwinter storm has been awesome!

Stay tuned for a fashion post tomorrow. =)

Thursday, January 19, 2012

Snowed In

As I mentioned before, I live in The Northwest. Here we get rain, rain, and more rain! The running joke is that Washington has 2 seasons: rain and less rain! Well this week we've has snow. And more snow. And more...can you guess? Snow!
So I am holed in. My hubby can work from home which is REALLY nice. We've ventured out in walks every day but so far we stayed within 2 miles (aka. reasonable walking distance) and yes, we did walk 2 miles in the snow at 6:30 last night to my in laws house...and back. It was actually fun.
But today after the power went out when the snow storm turned into an ice storm, we finally dug our car out to get a hot lunch. I'll spare you the details of our trek through a melting 18" of snow and getting towed out of trouble by an F250 truck, but we are back home waiting for power with a new iPhone. Yes, IPHONE! My upgrade was finally available and I got a new iPhone 4s! AND I am using it to post this! Super exciting! Anywho...hope all of you are having a slightly les eventful day than I am.
Be blessed!
P.S. Yes...I know that "anywho" is not a real word. But I like it so I use it anyways! =)

Wednesday, January 18, 2012

Dolman Tee

Like this shirt?

Well here's the story...

On Monday, I took about 20 minutes to hurry through the clothes racks at Goodwill.  When I decided to stop in, I had no idea that they were doing a 50% off sale in honor of MLK day! What a nice surprise! Yay for me!

So after sorting through a few racks of clothes and then sorting through my finds in a dressing room, I walked out of the store with 3 shirts.  How much did I pay?
7 DOLLARS TOTAL
Less than $3 per shirt!
I was thrilled!

All but one of the items needed some work to be wearable, but this was part of my goal.  Before I got into this "refashioning" thing, I had been very diligent to clean out my closet on a regular basis.  And since I don't really shop much anyways, my collection of useful clothes is almost non-existant.  However, I enjoy thrift shopping and this new discovery, that I can take clothes that don't fit and make them into something I like, has opened a whole new world of possibilities to me.

I used this awesome tutorial for the pattern.
  
I wanted something a little different for the neck line.  So I cut here..
I used this cool tutorial to finish it off.


I LOVE IT!

So keep posted for another Goodwill Refashion!


And I am linking up here!  This blog post doesn't have the links to my pins on pinterest, it instead has the links directly to the blogs they photos were pinned from.  Though if you go check out my boards, you will see the pins!

The Pinterest Challenge

Don't forget to follow me and leave a comment so that I can follow you too! <3
Be blessed

Tuesday, January 17, 2012

Garlic Butter

I am ridiculously excited about this post!  My FIRST recipe.  It is delicious and super easy!


WHO LOVES GARLIC BREAD?

My husband does.  But I don't.  I'm kind of a simple person when it comes to butter.  I like it on breads, rolls, etc, but I'm really fine without it too.  When I put it on, I spread it pretty thin.  Thus, the butter that is normally spread on store bought garlic bread is WAY to thick.  So in the store last Friday, Travis and I were trying to decide whether to get garlic bread or not.  Being the unselfish man he is, Travis bought regular garlic bread and suggested that maybe I make garlic butter at home so that we could put as much as we each wanted on it.

I started thinking....why not?

What you need:
1/2 cup butter at room temperature (really soft)
1 large clove of garlic
parsley

First crush the garlic into the bowl with the butter and generously sprinkle with fresh or dried parsley.  (Really though, add as much garlic as you want and the parsley is mostly just for looks!)  I used my Christmas gift from my mom (a Cuisinart handheld blender with wisk and food processor attachments - click on the link to check it on Amazon) with the whisk to mix it all together.

Note: Use a much larger bowl then you think you need.  I had little splatters of butter all around the area I was working by the time I finished with the whisk.  Oops!

Transfer it to a smaller bowl and serve with warm french bread!


I love the strong buttery flavor mixed with a fresh garlic taste.  I really liked it and my husband loved it too!

So go plan an Italian night with garlic bread on the side!

Alesha <3

Saturday, January 14, 2012

Linking Up

So...this post is exciting for two reasons.
  1. I am linking to my first blog!  ( I should have done it before now, but I've been scared...)
  2. This verse God really used in my life at the conference I went to last week.  (If you missed my post about it, go check it out!)  So...although the picture does not really go with the words of the verse, it goes with it in my mind.  The picture is my favorite of the scenery shots for the conference location.

God really talked to me about loving others even when they are hard to love.  I am told by God to love my fellow brothers and sisters in Christ even if I don't feel like it.  Later in the book (1 Peter 4:8), it reminds us that love overlooks sin...not in an unloving way.  But love does not get hung up and break unity over petty things.  I had some areas in my life where I needed to stop getting hung up over petty things.  So I am memorizing this verse as a reminder.


I hope you can be blessed as I was by these simple insights from God's word.  Be blessed!


Friday, January 13, 2012

Hello Again!

Hello Everyone!
Sorry that I kind of checked out without even a warning.  I'm still getting used to updating my blog frequently even during busy times.  So what has been so busy?
Well, I work every Saturday. ALL DAY!  Last Saturday I was at work for 15 hours to be exact!  Yep...it was fun.  And then Sunday was church.  Then I came home and made three large pans of lasagna, caesar salad, and rolls (I cheated on the rolls and just popped frozen ones in the oven).  These were for a young adult guys/girls night out (really more like 'in').  The even went really well even though not too many girls showed up.  Everyone had a blast.  But wait...what did I do when I got home at 9:45 that night?
Packed!  Yes, I finished packing two carry-ons and my "purse" (messenger bag).
Then Travis and crashed for about 3 1/2 hours until our alarm when off at 3:15 am.  By 4 am we were meeting a group at our church and heading off to the airport!
And after a 2+ hour flight and another hour drive, we arrived at our destination right before lunch.
Let me say...it was BEAUTIFUL!
We were there from Monday morning through Thursday afternoon for the Calvary Chapel Youth Workers Conference.  It was incredible!  I am from rainy Washington, so look at this SUN!


It was a much needed vacation to be sure!  We spent a lot of hours in session; listening to various pastors, worshiping, or going to breakout session workshops.  However, we also found time to spend in the sun, on the beach, and in the natural hot springs that are right on the bible school campus!  All in all it was a refreshing time of drawing closer to the Lord and other youth workers, not to mention a relaxing time to replenish my depleted vitamin D stores!

Jealous yet?  If not, here's a few more pictures...

Some beautiful greenery and architecture!

A beautiful sunset over the lake!

   
The hot springs!  We went in them at about 10:30 pm, two different nights.  They felt wonderful after a full day.  Great place to sit and talk about the day in peace and quiet.  We LOVED it! 


We spent one overcast afternoon at the beach (after stopping at In and Out, of coarse)!


A fun game of foot ball at the beach!  My friend Amanda and I watched and took pictures.  Look at that studly catch in the top photo...That's my man!

Windy, dirty beach photos

Amanda and I
<3 friends <3

The day we left we did a couples photo shoot on the campus.  Amanda and Timothy are both youth leaders in the middle school group and are dating.  Here are a few of my favorites!

 Timothy and Amanda
Travis and Alesha (me)

Hope you all have been having as fun a week as I have!  Now that I am back to cold, rainy Washington, I will try to get back on this blogging thing.  I have a few fun projects to share with you!

Don't forget to follow my blog and then comment on this post or another one so that I can follow you too!

Thursday, January 5, 2012

I was Featured

Hello Everyone! I am very excited to be featured for the first time on another blog. I am on the $0 Budget month that Stephanie at Full of Great Ideas is hosting!  Her blog is amazing and full of "great ideas"!  =)  So head over and take a look!  I am sure you will enjoy it.

Wednesday, January 4, 2012

Poll: So You Think You Can Sew {Week 1: For the Home}

Hey Everyone! There is a super fun competition going on over at Mommy by Day Crafter by Night! I just voted in round 2 of her "So You Think You Can Sew" competition. There are a twelve amazingly talented ladies over there sharing their projects. Go ahead and check it out! I voted...I wished I could have voted for more than just one. =( So go support these ladies and enjoy all the fun projects!

Poll: So You Think You Can Sew {Week 1: For the Home}

Also, I was taking some time to read last night all curled up in a blanket and here are some thoughts that I had while reading the book of Isaiah.

Chapter 24 of Isaiah is talking about God's final judgement on the earth. Verses 4-6 especially describe the defilement of the earth that has come from sin. When we look around us, it is easy to see that defilement in every area of society and even our own lives. I don't think we understand what a wretched place this earth has become…and I don't think we ever will until we can compare it to heaven. (Oh I can't wait for that day!

But the main thought that stuck out to me was in verse 23, the last verse in the chapter. It says, "Then the moon will be disgraced And the sun ashamed, For the LORD of hosts will reign On Mount Zion and in Jerusalem And before His elders, gloriously." (NKJV)

Wow! Do you see that? The LORD, reigning in His full glory, is so magnificent that the moon is disgraced and the sun is ashamed! Once again…wow! Can you even imagine something that radiant and beautiful? Something so wonderful and full of light that the SUN is put to shame?

This is our God! Let us praise Him for He alone is worthy.

Have a blessed day!

Monday, January 2, 2012

Sweater Refashion

Hello everyone!  So last week I posted the easiest craft from my "sisters crafting day", so now I'll post the most complicated one.  But don't get scared off!  It just takes a little extra time and concentration.  Really though, if I can do it, you can!


Here we go!

Materials Needed:

  • Old sweater
  • Sewing machine
  • Thread that matches the sweater
  • Scissors
  • Measuring tape/ruler
  • 2-3 hours
Step One:
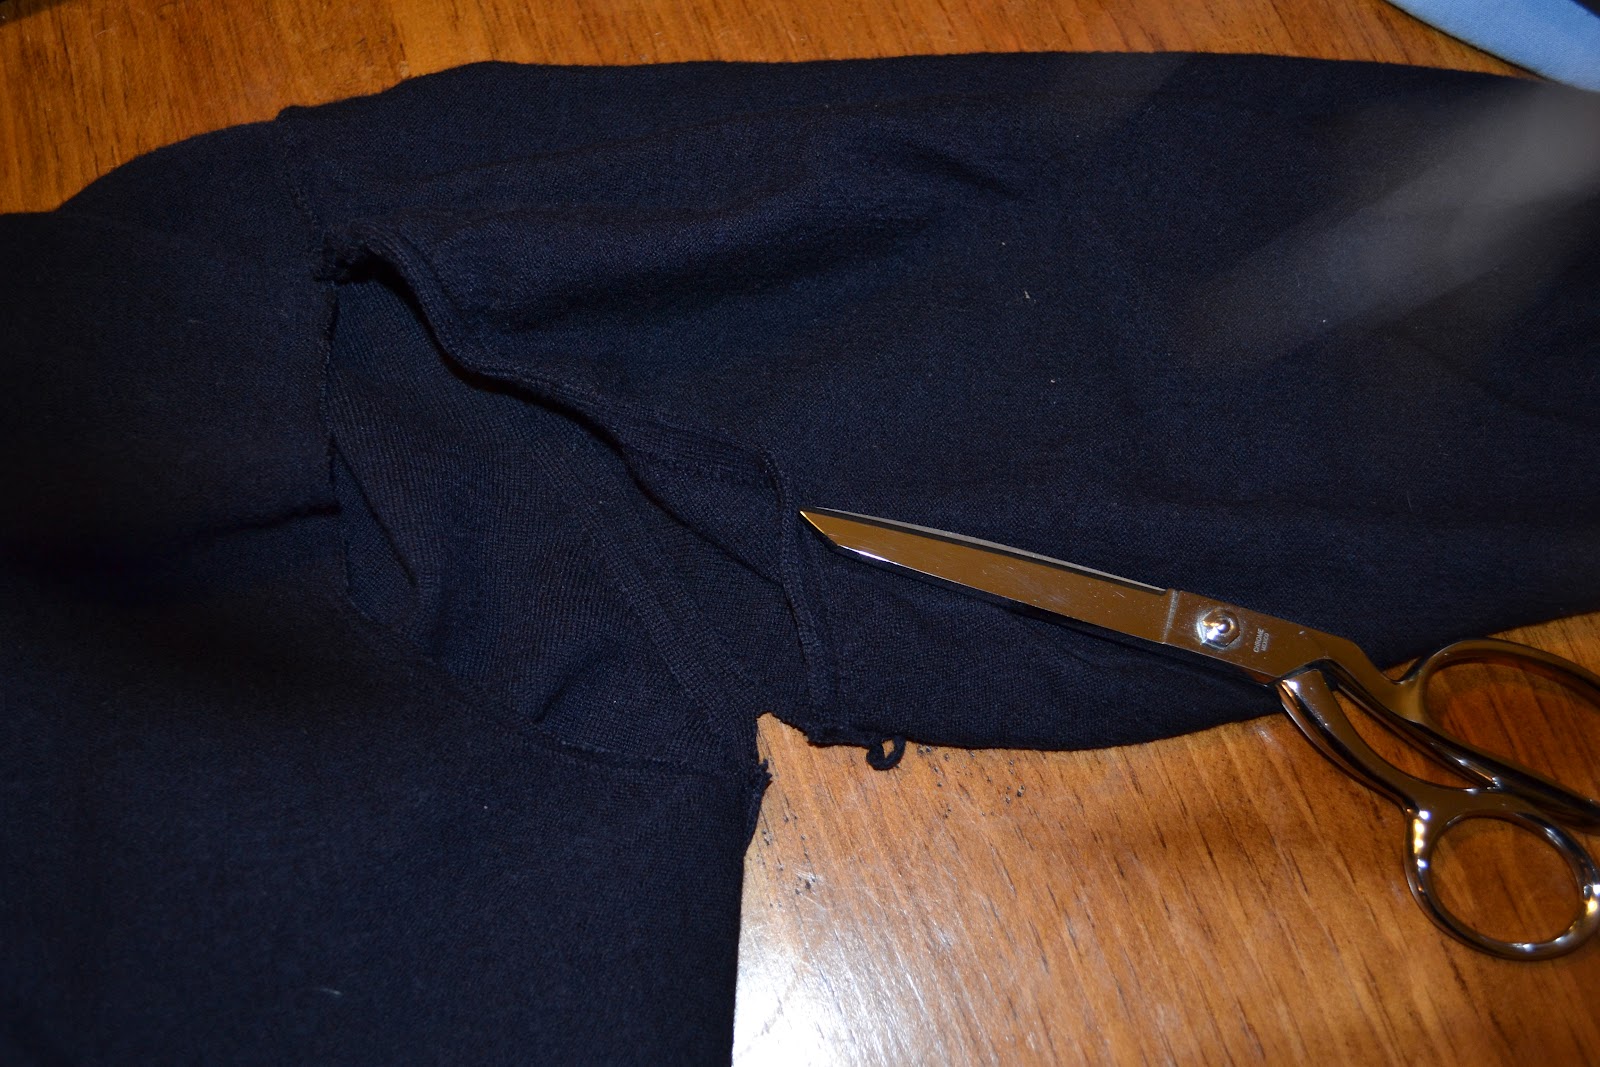
Cut the sleeves off of the sweater, cutting right along the seam.  Set them aside for later.


Step Two:
Lay your sweater out on a flat surface, front facing up.  Measure the bottom of your sweater.  Mine was 14" across.  Find the middle point and mark it with a fabric marking pencil.  (Note - I don't own a fabric marking pencil so I simply use a white colored pencil.  It works great!)


Step Three:
Use a flat edge to mark from the center bottom of the sweater, all the way to the collar.  Then cut along your line to open the sweater up on the front.


Step Four:
My sweater had buttons along the top, so I cut them off and cut off as much excess fabric as I could.

I couldn't cut off the button holes or my
line would have been uneven.  So I just
cut off the extra fabric surrounding the button holes.
They will be hidden later, so don't worry!


Step Five:
Starting at the bottom of the sweater, fold each edge in a half inch.  Make sure you are folding the fabric toward the INSIDE of the sweater.  Iron the fold and then pin it as you work your way up the sweater.  Don't cut anything yet!  Keep folding fabric under, iron and pinning all the way around the collar.  You will probably fold it under more than half and inch around the collar depending on what your sweater looks like and the look you are going for.  Carefully try on the sweater with pins in and adjust the fron until you get a look you like.  (Note - I waited and did the collar later, but it just created an extra step and made it look not quite as finished.)

I don't have any pictures of the collar. Sorry!  I'm still getting used to taking pictures while I craft!

Step Six:
Sew it up!  Sew along the inside of the fold (1/2" seam allowance).  Try to keep the distance you sew from the edge even all the way around to give the edges of your sweater a nice clean look.


Step Seven:
Take out the pins and try on your sweater.  It should look like a vest right now.  Decide how much fabric needs to be taken off the sides to achieve the look you want.  Place pins at the sleeve hole and the hem to show what to take off.  (Note - It is easier to have someone help you with this step.  I had my sister measure and pin for me.)  DO NOT CUT EXCESS FABRIC!


Step Eight:
Turn the sweater inside out and repin the marks.  Sew in a straight line from the top pin to the bottom.  Do this on both sides!  Before you cut the fabric off, try the sweater on to make sure you like the shape and width of the sweater.  Don't worry if you have to do some adjusting.  I resewed one of my side seams 3 or 4 times!  When you are satisfied with the look, cut off the excess fabric.  
Just a reminder...make sure you are sewing with the RIGHT SIDES TOGETHER!  =)


Step Nine:
Now grab those sleeves again!  The sleeves were REALLY big and baggy on me.  To fix this, try your sleeve on INSIDE OUT and pin under the arm to a comfortable tightness.  Then draw a straight line from the pin all the way down the sleeve.  Then sew along the line you drew.  Turn your sleeve right side out and try it on.  If it fits well, cut off the excess fabric.
Repeat this step with your other sleeve.
Step Ten:
I wanted to make my sweater have 3/4 length sleeves so here is what I did...
With the sleeve right side out fold the cuff up over the sleeve.    Match up the seam under the arm and pin it!  Then sew along the bottom of the cuff (the part attached to the sweater).  Gently stretch the fabric as you go to make sure you don't get any puckers or wrinkles.  (Note - I pined mine all the way around to help me get it nice and even.)  Remove the pins and try it on.  Fold the cuff down to make sure the length is correct.  If you are happy, cut off the excess fabric.


Step Eleven:
Turn the sleeves RIGHT SIDE OUT and the sweater WRONG SIDE OUT. Match up the side seam on the sweater and the seam on the underside of the sleeve. PIN IT!


Pin the top of the sleeve to the top of the shoulder making sure that the fabric is even on either side.  Place other pins around the sleeve opening to hold it in place.  (Note - The fabric on the shoulder of my sweater hung off my shoulder a bit and would have made the sleeves sit down my shoulder a ways instead of on top of my shoulder like they should.  To fix this, instead of matching up the edges of the fabric when pinning at the top of the shoulder, I pinned the edge of the sleeve an inch in from the edge of the shoulder fabric and cut the excess fabric after it was sewn.  Sorry that I don't have a picture for this step!  If you have any questions, leave a comment and I will do my best to answer them.)

Step Twelve:
Sew around the opening of the sleeve.  Make sure you catch both layers of fabric.  I sewed it at less than a 1/4" to give myself as little fabric as possible on the inside.

Trim any thread and try on your beautiful masterpiece!

Here you go!  Hope you all find this useful.  I had a lot of fun with it and felt like a pro when I finished!  Have fun and show me pictures when you use it!