Showing posts with label Fall. Show all posts

Wednesday, November 7, 2012

WIWW: Lace and Boots

Praise the Lord for friends who clean out their closets!

Two of my three sweet girl friends down here in Florida (yes, we don't know many people yet) cleaned out their closets a few weeks after we got here. Yay for me!

So I volunteered to take the clothes to Goodwill in exchange for being able to sift through them first and take what I wanted.


This sheer, lacy shirt was one of my favorite second-hand finds! Isn't it beautiful!

And I needed an outfit with which to model this beautiful headband/ear warmer for AleshaBlessedDesigns (my etsy shop). The shirt fit the bill perfectly.

Additionally, see these boots? I got them online for $15 last winter at Shiekh Shoes. Black boot heels? Yes please! I love them so much! But unfortunately, I changed out of them right after this photo shoot, because my husband and I were going thrift shopping. Heels and thrift shopping don't really mix. =)
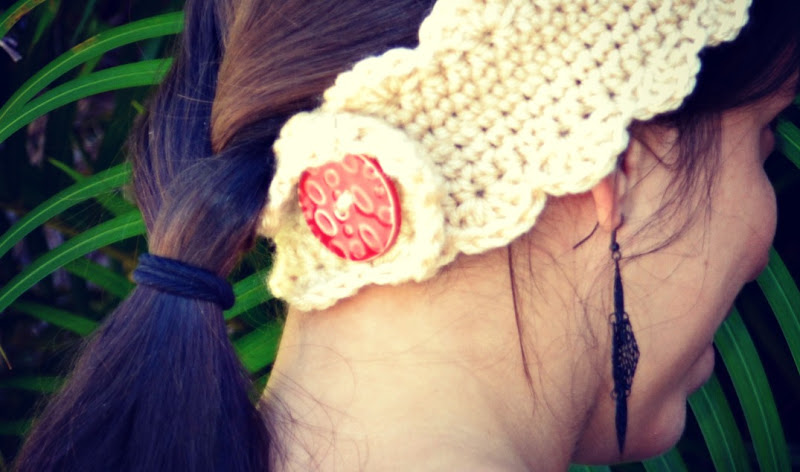

Find this headband and more for sale here 
I love wearing these headbands with big, dangle earring. I feel sophisticated and elegant, while still warm and cozy.


Skinny jeans + dark cami + sheer top + colorful sweater + boots + ear warmer + giant earrings = one of my all time favorite fall outfits

...maybe next time I'll actually keep it on all day! Haha!

What is one of your favorite fall outfits?

Be blessed
<3

Linking Up:

  pleated poppy

Thursday, November 1, 2012

AleshaBlessedDesigns

Hello Dear Friends!

Today I am beyond excited to announce the opening of...


My Etsy Shop is now open!

Over the past 4 weeks, I have spent hours dreaming, planning, designing, and (or coarse) crocheting.  I have doubted myself many times, but in the end, I knew I needed to make the leap and give it my ALL.  And I am so proud of the final result!

Here is just a peek of what you will find for sale there.

Ruffled with Giant Flower Headband in Gray

Double Bow Headband in Black

Ruffled with Giant Flower Headband in Cream

Double Bow Headbands in Black - Adult and Child

Girls Double Bow Headband in Black

Simple Bow Headband in Black 
Girls Simple Bow Headband in Black


Okay, pause right here with me...
Is she not the CUTEST.THING.EVER???
I loved doing this little photo shoot with her. She is the sweetest little girl, but has a hilariously silly and spunky side as well. And no, she's not mine. Haha! But we did pretend! =)

Mother/Daughter Sets
I won't lie...its been a bit overwhelming at times, but God is so faithful and good.
So spread the word, like my page on Etsy, and share it with everyone you know! I am super excited to start this new blogging venture.

Oh...and a little secret. I didn't show you ALL the items. There are more! And more in the works too...whew! If nothing else, I hope I can bring some inspiration and courage to your crafting through mine.

P.S. The adorable new blog and shop design that is slowly taking over? They were created with the help of Kara from The Snugly Duckling. Go say hi and tell her how nice it's all starting to look!

Be blessed
<3

Linking Up:
The 36th AVENUE

Monday, October 1, 2012

Healthy Apple Pie Minis

Healthy Apple Pie? Well...if you don't count all the butter I put into the crust... Haha!


Remember this sugar fast I'm doing?
Well, I can still have fruit and honey, and I've hit this point where I am ready to embrace the challenge but not give up on my sweet tooth.
So I figured, honey is sweet, why not make sweets with honey as my sweetener instead of sugar?

These were fabulous hot out of the oven! They would be even better with whipped cream or ice cream!
But hey, I'm not complaining! =)


APPLE PIE FILLING:
Ingredients:
2 Diced Apples (small cubes)
1/4 to 1/3 Cup Honey
1/2 - 1 tsp Vanilla
Nutmeg, Cinnamon, and Cloves to taste
A Pinch of Pumpkin Pie Spice

Instructions:
Combine and stir well. Let the mixture sit while you make the crust so that the flavors combine.

CRUST
Ingredients:
2 Cups Flour
1/2 tsp Salt
1 Cube of Butter
1/2 Cube of Margarine
1 Cup of Ice Water

Instructions:
Sift flour and salt together.  Cut in the butter and margarine.  Pour in the ice water until the dough sticks together. Chill for an hour.

THEN...

FINALLY...

{Note: Edges should be turning brown very slightly}

I baked the first batch in my regular oven on a pizza stone and the second batch (pictured above) in my toaster oven. I think the toaster oven dried them out a bit, so I would definitely recommend doing it in the oven.


Enjoy!

Be blessed.
<3